.svg)
.svg)
.svg)


.svg)


.svg)
.svg)

.svg)


By using SQL Server Export and Import wizard, we can export from the source database or import from the destination to transfer the data.
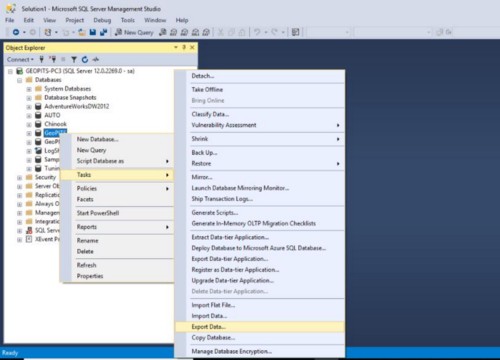
STEP 1: From the SQL Server Management Studio, right-click on the GEOPITS database in the object explorer, then choose Tasks -> Export Data
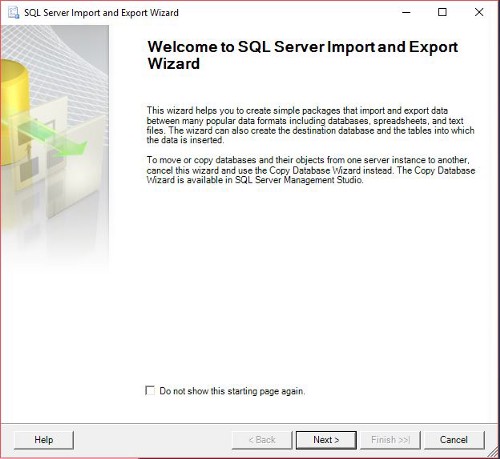
STEP 2: After SQL Server Import and Export Wizard popped up, click Next.
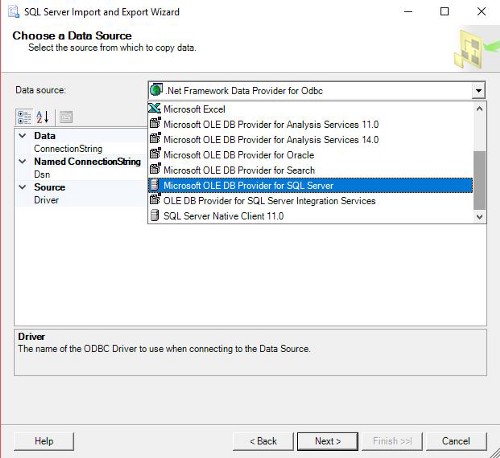
STEP 3: Now Select the Data source from the drop box from which you want to copy the data.
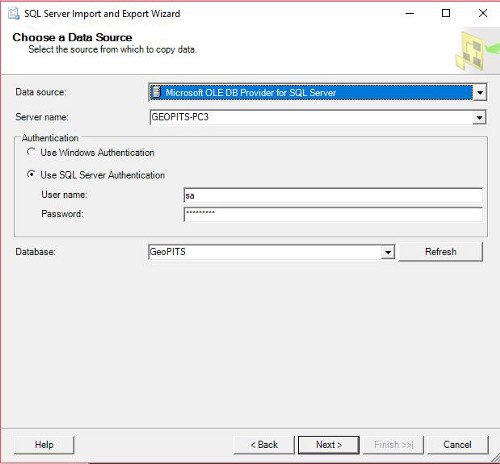
STEP 4: From this Choose a Data Source window, specify the source Server Name, the Authentication method that will be used to connect to the source server and the source database name. Then click Next.
STEP 5: Now Select the Destination from the drop box for where you want to copy the data.
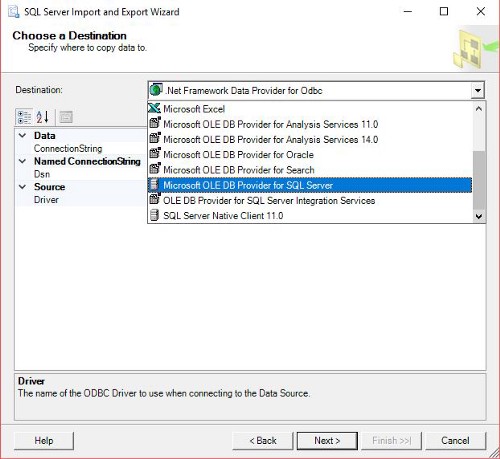
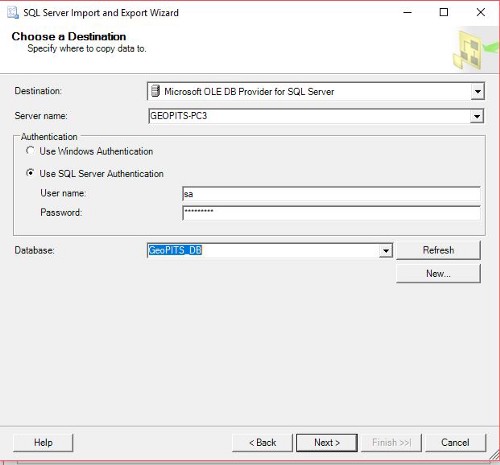
STEP 6: From this Choose a Destination window, specify the destination server name, the Authentication method that will be used to connect to the destination server and the destination database name. Then click Next.
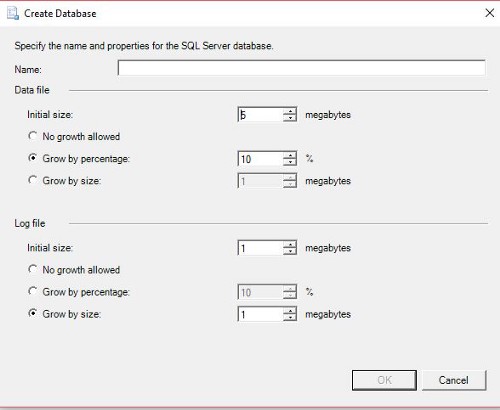
In addition to the existing database, we can create new database by clicking on the New button from Choose a Destination window. After clicking the New button, you will get the below screen. Then specify the Name of the database and corresponding Data file and Log file size as required.
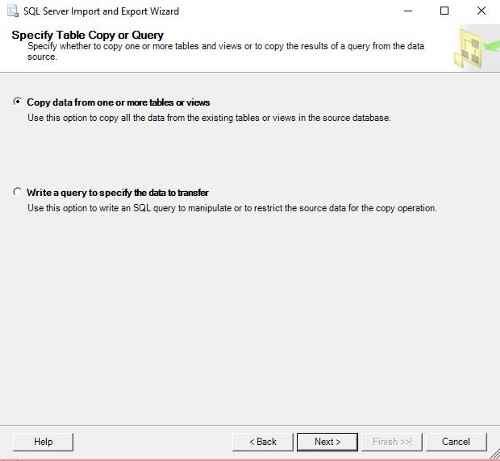
STEP 7: Now select Copy table from one or more tables or views radio button and then click Next.
STEP 8: Select the tables or views and that will be copied from the chosen source database to the destination one, then click Next.
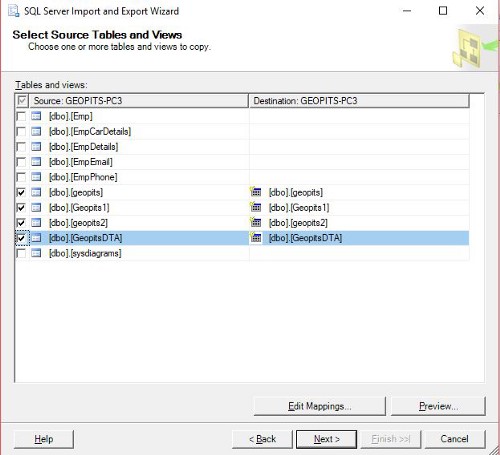
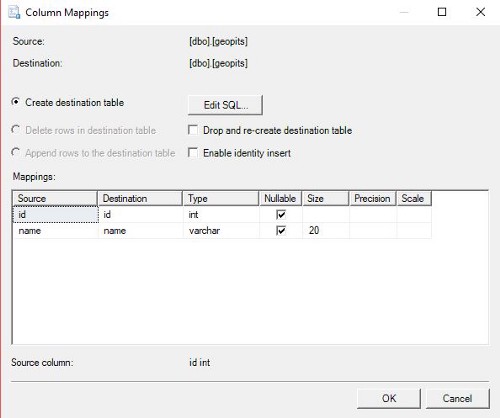
In order to make sure that the tables will be created in the destination database, click on Edit Mappings and make sure that the Create destination table is ticked, and if any of the tables contain IDENTITY column, then tick Enable Identity Insert and then click OK. If you have more than one table to be exported to the destination database then you need to go through the Edit Mapping check table by table.
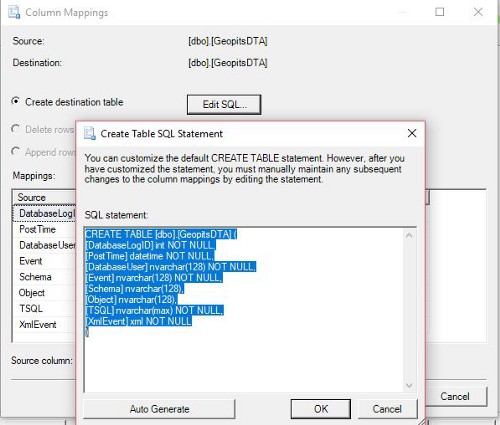
Also we can edit the Tables by clicking Edit SQL and then click OK.
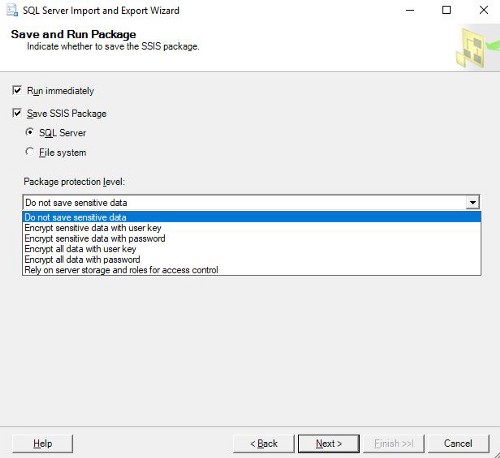
STEP 9: In the Run package, we can select either Run immediately or Save SSIS package. If Run Immediately option is selected then click Next.
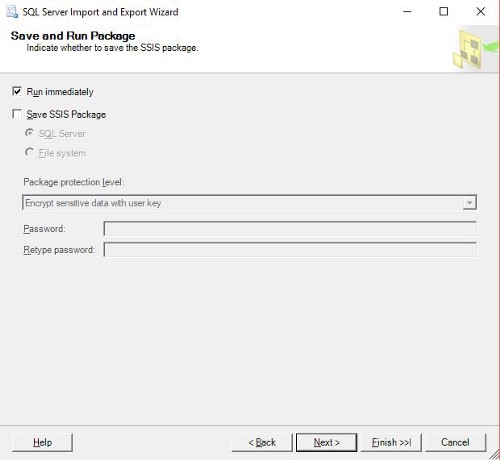
If Save SSIS package is ticked then select SQL server and provide the Package protection level from the drop box and then click Next followed by Authentication details. Now specify the SSIS package details followed by Authentication method and click Next.
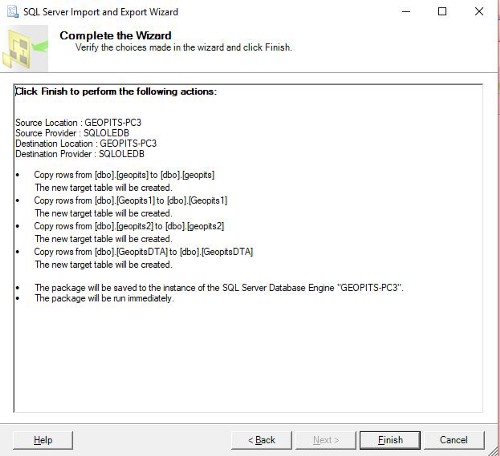
STEP 10: In the complete wizard window, click Finish.
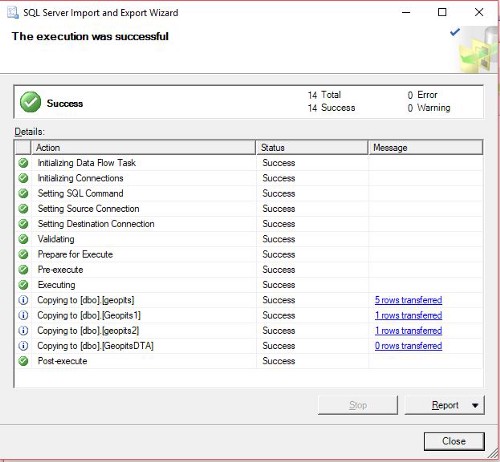
STEP 11: Once the execution is completed successfully, you can view the steps and status of the tables that are migrated and the number of records transferred. Review the steps and the messages and if there is no errors, click Close.
Further reading:
If you found this article helpful, you might want to check out these related resources,
.svg)

.svg)